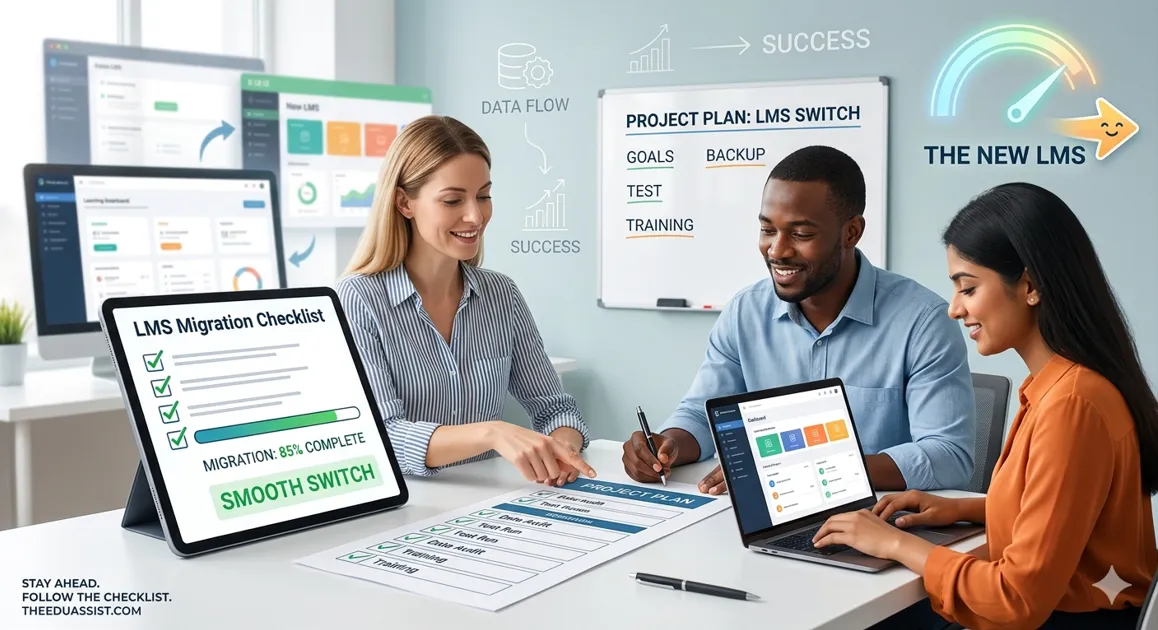
Are you planning to switch your learning platform? If so, you need a clear LMS migration checklist. Learning management system migration means moving all your courses, users, and data to a new platform. It sounds simple. However, without a plan, it can cause data loss, downtime, and budget overruns.
So, why does it matter? First, it protects your valuable learning data. Second, it keeps your teams trained without long breaks. Third, it helps you avoid costly mistakes before they happen.
In this guide, you will get a full LMS migration checklist, a ready-to-use plan, and easy steps to follow. Whether you are new to this or managing a large enterprise, this article covers everything. By the end, you will know exactly how to migrate a learning management system with confidence.
What is LMS Migration?
LMS migration is the process of moving your courses, users, and settings from one platform to another. In other words, you are packing up your entire learning environment and setting it up in a new place.
Organizations often need to migrate LMS systems when a contract ends, a platform ages out, or a company merges with another. Moreover, rapid business growth can push teams beyond what their current system can handle.
Simply put, learning management system migration is a structured move. It is not just copying files. Instead, it involves careful planning, testing, and validation at every stage. To stay organized, many teams rely on a professional LMS migration checklist.
Why LMS Migration is Important
Many organizations keep using old platforms well past their prime. As a result, they face growing problems that hurt both learners and admins.
First, outdated systems often lack mobile learning, AI features, or modern analytics. Second, they become harder to connect with newer tools your team uses every day. Therefore, productivity slows down across the board.
Additionally, the cost of maintaining legacy software rises every year. In many cases, it exceeds the cost of switching to a better platform entirely. Beyond cost, slow and clunky platforms reduce learner engagement and hurt course completion rates.
Scalability is another key reason to act. As your team grows, your LMS must handle more users without breaking. Consequently, addressing these issues early prevents much bigger problems later.
Complete LMS Migration Checklist
Below is your step-by-step LMS migration checklist. Follow each phase in order. Skipping steps is, indeed, the top cause of data loss and project delays.
1. Define Migration Goals
First of all, ask yourself why you are switching. Your answer shapes every decision ahead. For example, goals may include reducing costs, improving user experience, or gaining better reports.
- List your top three reasons for switching
- Identify the key features you need in a new LMS
- Set a clear and realistic go-live date
2. Audit Existing LMS Data
Next, take stock of everything you currently have. This includes all courses, enrolled users, quiz scores, completion records, and analytics data. In addition, note every third-party tool connected to your current system.
- Export a full list of users and their roles
- Document all active and archived courses
- Record all completion and progress data
- List all integrations and connected tools
3. Choose the Right LMS Platform
Choosing the right LMS is one of the most important steps. Therefore, do not rush it. Compare at least three vendors. Look beyond price alone check ease of use, SCORM support, and customer service quality.
- Compare at least three LMS vendors side by side
- Request demos and free trials from each vendor
- Confirm data import and export capabilities
- Review the SLA and support response times
4. Create an LMS Migration Project Plan
An LMS migration project plan keeps your team aligned. Without it, confusion and missed deadlines are almost certain. Furthermore, it gives stakeholders a clear view of progress at every stage.
- Set project milestones with firm deadlines
- Assign a team lead for each migration phase
- Define what success looks like for this project
- Schedule weekly status reviews with all stakeholders
5. Backup All Data
Before you touch anything, back up everything. This step is critical. It protects you if something goes wrong during the transfer. Always store backups in at least two separate, secure locations. Using an LMS migration checklist ensures you never miss a backup step.
- Create a full export of all LMS content
- Store backups on both cloud and local drives
- Verify backup integrity before moving forward
6. Map Data Structure
Different platforms use different data formats. Therefore, you must map how your current fields match those in the new system. This applies to user roles, course categories, and media file formats. Otherwise, important data may not transfer correctly.
- Map all user roles and permissions
- Align course categories and content tags
- Convert SCORM or xAPI files if needed
- Check video and media format compatibility

7. Run a Test Migration
Always run a pilot test before the full move. Select a small set of courses and users. Then, check every detail carefully after the test transfer. As a result, you will catch errors before they affect everyone.
- Select five to ten courses for the pilot run
- Migrate a small sample user group
- Verify content, progress data, and logins
- Log all errors and fix them before full migration
8. Execute Full Migration
After a successful test, follow your LMS migration checklist to proceed with the full rollout. Use a phased approach whenever possible. Moving everything at once, however, greatly increases your risk of failure. Instead, move users and courses in batches.
- Migrate users in batches sorted by department
- Move courses in order of business priority
- Keep the old system live as a fallback during the switch
9. Post-Migration Testing
Once the data is moved, verify that everything works. Check logins, course content, completion tracking, and certificates. Also, test every integration connected to the new platform. Do not skip this step, even when you feel confident.
- Test logins for all user role types
- Confirm all course content displays correctly
- Verify completion tracking and reporting accuracy
- Test all integrations such as SSO and HR systems
10. Train Users and Teams
Even the best platform fails if users do not understand it. Therefore, provide role-specific training before launch day. Admins, instructors, and learners all have different needs. As a result, tailor each training session to the right audience.
- Train admins on all backend settings
- Guide instructors through the course creation tools
- Share quick-start guides with learners
- Set up a dedicated helpdesk or support channel
LMS Migration Phases at a Glance
The table below shows each phase, its main action, and the time you should plan for:
| Phase | Key Action | Estimated Time |
| Planning | Audit data, pick new LMS | 2–4 weeks |
| Preparation | Backup data, map structure | 1–2 weeks |
| Test Migration | Pilot with sample courses | 1 week |
| Full Migration | Move all users and courses | 1–3 weeks |
| Post-Migration | Test everything and go live | 1–2 weeks |
LMS Migration Plan
A solid LMS migration plan is more than a checklist. It is a strategic document that guides your whole team from day one to go-live. Three elements in your LMS migration checklist, in particular, make or break every plan.
First, timeline planning matters most. Work backwards from your go-live date. Then, add buffer time between each phase. Rushing any stage, especially testing, almost always leads to problems after launch.
Second, stakeholder alignment is equally vital. Include HR, IT, department heads, and L&D teams from the start. Each group has different needs and priorities. Therefore, involve them early so you avoid costly surprises.
Third, risk management means writing down what could go wrong before it does. Common risks include data format mismatches, integration failures, and user resistance. Address each one in your plan before migration begins.
LMS Migration Best Practices
Following best practices for LMS migration helps you avoid the most common mistakes. Here are the top strategies that experienced teams rely on:
- Start early. Most migrations take longer than expected. Therefore, give yourself at least six to eight weeks of buffer time.
- Involve stakeholders. Decisions made without key teams often need to be reversed later. Consequently, this wastes both time and budget.
- Test frequently. Run multiple rounds of testing. Each round should, furthermore, focus on a different part of the system.
- Avoid a big-bang migration. Moving everything at once is risky. Instead, use a phased rollout to catch issues early.
- Document everything. Keep clear records of what was moved and when. As a result, you will be protected during audits.
- Communicate with users. Notify learners and instructors well in advance. Clear communication, after all, reduces confusion.
LMS Migration Risks and Challenges
Assessing LMS migration risks early keeps your project safe from expensive surprises. Several challenges, in fact, show up in almost every migration.
Data loss is the most serious risk of all. It happens when files are not exported correctly or when field mappings do not align. Therefore, always verify data completeness after every single transfer step.
Downtime is another major concern. Even a few hours of unavailability can disrupt active training programs. As a result, plan your migration window carefully, preferably during weekends.
Integration failure happens when connected systems such as HR software or SSO stop working after the switch. Consequently, test all integrations during the pilot phase, not after go-live.
Finally, formatting issues are very common. Course content may look different in the new LMS. So, always review all courses visually after every migration step.
LMS Migration Tools and Services
The right LMS migration tools cut down on manual effort and improve accuracy. Several options exist, depending on your needs and budget.
Automation tools handle data mapping, file conversion, and bulk transfers. Moreover, many modern LMS vendors include built-in migration wizards that simplify the process considerably.
Vendor support services are worth considering for large migrations. In addition, many providers offer paid migration packages that include data validation. If you want expert help, check out our LMS Integration & Migration Services for a smooth transition.
Manual migration works well for small teams with few users. However, for enterprise LMS migration, automation is almost always the safer choice. Popular options include CSV tools, SCORM packaging software, and xAPI converters.
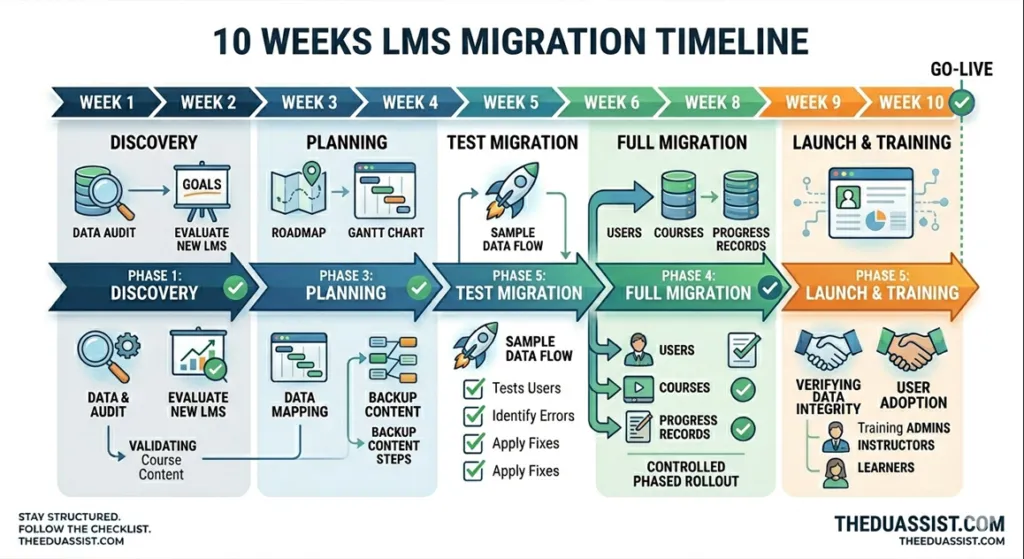
LMS Migration Project Plan Template
Use this simple LMS migration project plan template as a starting point.
Phase 1: Discovery (Weeks 1-2)
Start by auditing your current platform to see what stays and what goes. Once you define your primary goals, you can evaluate and pick the best new LMS for your needs.
Phase 2: Planning (Weeks 3-4)
During this stage, you must assign clear roles to your migration team. Create a detailed data map for your content and, most importantly, back up every single file before the move.
Phase 3: Test Migration (Week 5)
Within this week, run a pilot test using a small sample of courses and users. This step allows you to identify technical errors and fix them before the full rollout begins.
Phase 4: Full Migration (Weeks 6-8)
Moving to the execution phase, you should use a phased rollout to transfer your data in batches. Always keep your old system available as a safety fallback during this transition.
Phase 5: Launch and Training (Weeks 9-10)
Finally, focus on training all your user groups to ensure they are comfortable with the new interface. After going live, continue to monitor performance to guarantee a successful switch.
References
- The Ultimate LMS Migration Checklist (Atomic Jolt)
- LMS Migration Guide for 2026: Reduce Downtime (isEazy)
- Streamlining LMS Migration in 2026 (BenchPrep)
- LMS Migration: Complete Checklist + Quick Wins (Thirst)
Conclusion
A well-planned LMS migration checklist takes the guesswork out of switching platforms. Follow each step, involve your team early, and always test before going live. The process takes time. However, the result a faster, more modern learning environment is absolutely worth it.
Furthermore, remember to document everything along the way. A clear LMS migration plan protects your data and keeps all stakeholders aligned. In addition, it gives your team a reliable reference if anything goes wrong. So, start your planning today. Use this guide to ensure your next switch is a total success.
Frequently Asked Questions
What is LMS migration?
LMS migration is the process of moving learning content, user records, and settings from one platform to another. Organizations typically migrate when their current system becomes outdated or too costly.
What is included in an LMS migration checklist?
A complete LMS migration checklist covers goal setting, data auditing, platform selection, project planning, data backup, data mapping, test migration, full migration, post-migration testing, and user training.
How long does LMS migration take?
Most LMS migrations take between six and twelve weeks. Smaller teams can finish in four to six weeks. However, larger firms may need three to six months.
What is an LMS migration project plan?
An LMS migration project plan is a structured document that maps every phase of your migration. It includes timelines, task assignments, and success criteria.
What are common LMS migration tools?
Common tools include CSV export utilities, SCORM packaging software, and xAPI converters. In addition, many vendors offer professional migration services.
Authored by: Laiba Ayaz