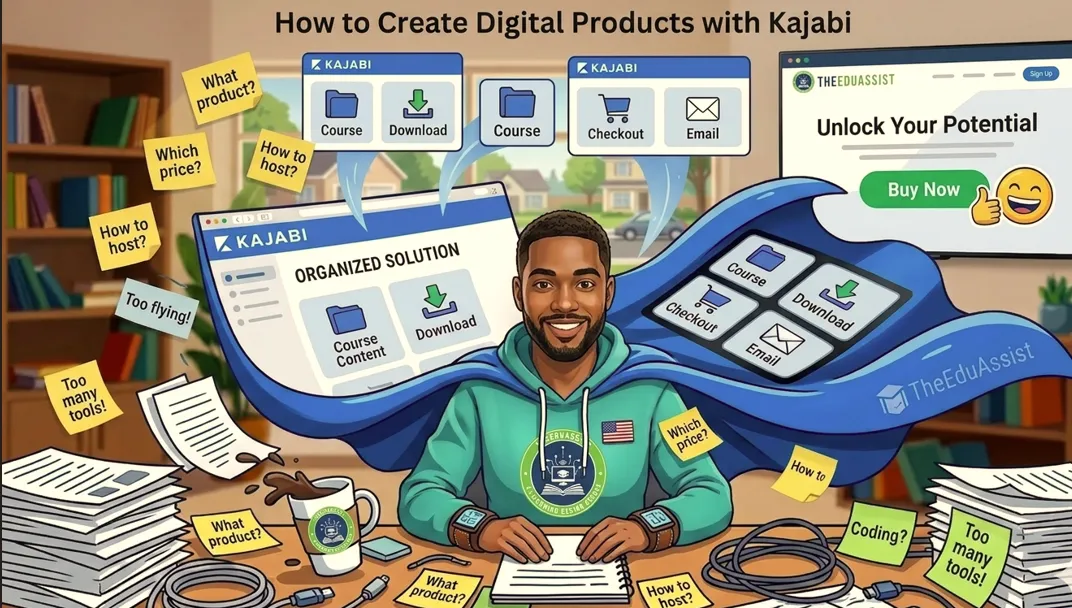
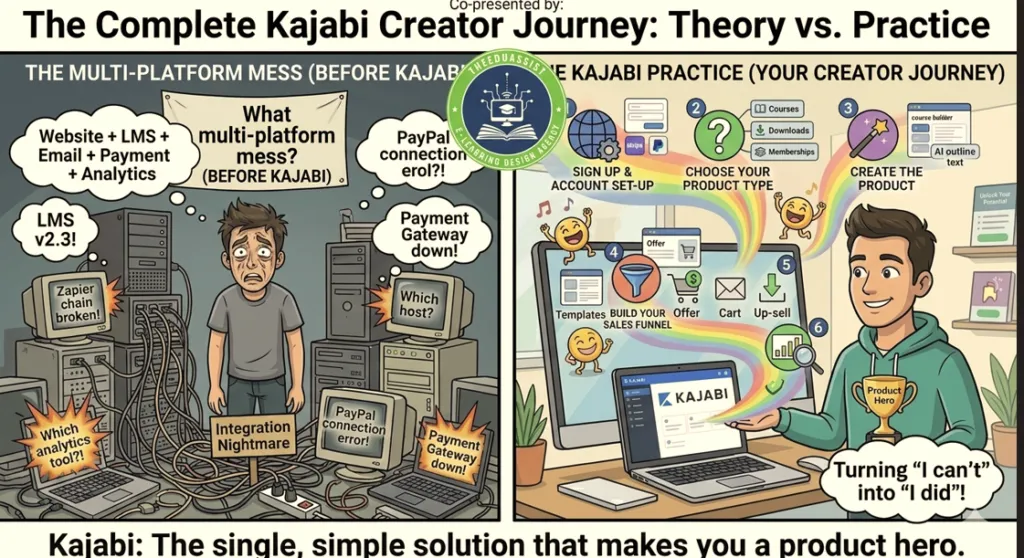
Many course creators struggle to turn their knowledge into a steady stream of income.The solution lies in an all‑in‑one platform that lets you plan, host, and sell digital products in one place. Kajabi does exactly that, combining course hosting, website building, email marketing, and checkout into a single workflow.
They record videos, write worksheets, and design slides, but then get stuck with tools that are either too technical or too fragmented. The result is scattered content, low sales, and constant platform switching that eats up precious time.
For solopreneurs and independent creators, this matters because a single digital product can:
- Generate recurring income online
- Scale beyond live sessions
- Build credibility and trust with your audiencee
In this guide, you’ll learn a step‑by‑step system to:
- Create digital products inside Kajabi
- Set up offers and pricing
- Sell to your audience from a professional website
- Scale with bundles, downloads, and automation
What Is Kajabi and Why It Fits Learning Businesses
Kajabi is an all‑in‑one platform designed for knowledge businesses anyone who sells courses, coaching, memberships, or digital downloads. Instead of juggling multiple tools, you can keep everything under one dashboard: courses, websites, email lists, and payments.
For course creators, coaches, and training institutes, this simplifies:
- Product creation and delivery
- Sales and checkout
- Marketing and automation
Kajabi supports multiple types of digital products:
- Full online courses (with modules, lessons, quizzes)
- Membership sites and communities
- Coaching programs and 1:1 offers
- Digital downloads (PDFs, templates, swipe files)
This structure helps you start small with one product and then layer additional offers as your audience grows.
Step 1: Plan Your Digital Product in Kajabi
Before you touch the Kajabi dashboard, decide what you are actually creating.
1. Choose Your Product Type
Decide which format fits your goal and audience:
- Mini‑course – 3–5 short lessons that solve one specific problem.
- Flagship course – 6+ modules with videos, workbooks, and optional group coaching.
- Digital download – PDF guide, checklist, or Canva template that solves a quick need.
- Bundled package – Combination of course + templates + community access.
For example, a corporate trainer might start with:
- A mini‑course on “Designing Engaging Learning Modules”
- A companion downloadable template pack (storyboards, scripts, rubrics)
2. Define the Outcome for Learners
Ask:
- What will the learner be able to do after completing this product?
- What specific pain point does it solve?
Write this as a one‑sentence statement. For example:
“By the end of this course, learning professionals will be able to design a 30‑minute micro‑module with clear learning objectives and practice activities.”
Use this outcome statement in your product title, sales page, and lesson structure.
Step 2: Create a Course or Download Product in Kajabi
Once you have a plan, jump into the Kajabi dashboard.
2.1 Start a New Product
- Go to Products in the left menu.
- Click New Product.
- Choose:
- Course (for video‑based learning)
- Downloads (for PDFs, templates, etc.)
- Membership (for an ongoing community)
You can rename this product later, but start with something clear like:
- “Microlearning Design Lab”
- “Onboarding Training Kit – PDF Templates”
2.2 Build a Course Product (Step‑by‑Step)
- Title and description
- Add a clear title.
- Write a short description that explains:
- Who this is for
- What they will learn
- What they will create
- Add modules and lessons
In Kajabi, a course is broken into Modules, and each module contains Lessons.- Go to Outline inside your course.
- Create a module for each major topic (e.g., “Module 1: Planning Your Offer”).
- Add lessons under each module (e.g., “Lesson 1.1: Define Your Audience”).
- Upload content
In each lesson, you can:- Embed a video (recorded in Kajabi or uploaded from your camera)
- Upload a PDF or slide deck
- Add a text lesson with notes and links
- A 5‑minute talking‑head video
- A downloadable script outline
- A short quiz or reflection prompt
2.3 Publish the Course
Before you sell, set the publishing status:
- Draft – Not visible to students
- Published – Visible and accessible to enrolled users
Click Publish once you’re happy with the structure and content. You can always update lessons later.

Step 3: Create Digital Downloads in Kajabi
If you want quick‑win products, Download Products are ideal.
3.1 How Downloads Work
With Kajabi’s Downloads product type, you can:
- Bundle multiple PDFs, images, or templates into one product
- Protect files behind a paywall
- Let customers access everything from their Member Library
Each download product counts as one product slot on your plan, even if you include 20+ files.
3.2 Create a Downloads Product
Follow these steps:
- Go to Products → Downloads.
- Click Get Started or + New Download.
- Add:
- Title (e.g., “Microlearning Script Templates”)
- Description (what the user will get)
- Thumbnail image
- Under Files, click Choose files and upload:
- PDFs
- Canva templates
- Checklists
- Slides
- Click Skip for now if you want to set up pricing later, or create an Offer immediately.
You can always come back and add more files, rename files, or delete files from the Files tab inside the Downloads product.
3.3 Style Your Downloads
Kajabi uses your Style Guide to control the look of your downloads:
- Colors (background, primary buttons, text)
- Fonts (headings and body)
- Button colors
To update these:
- Go to Website → Design → Customize.
- Open Style Guide.
- Change:
- Page background color
- Primary color (for buttons and icons)
- Body and heading font colors
- Button background and text color
Changes here affect all pages using that template, including your Download Products.
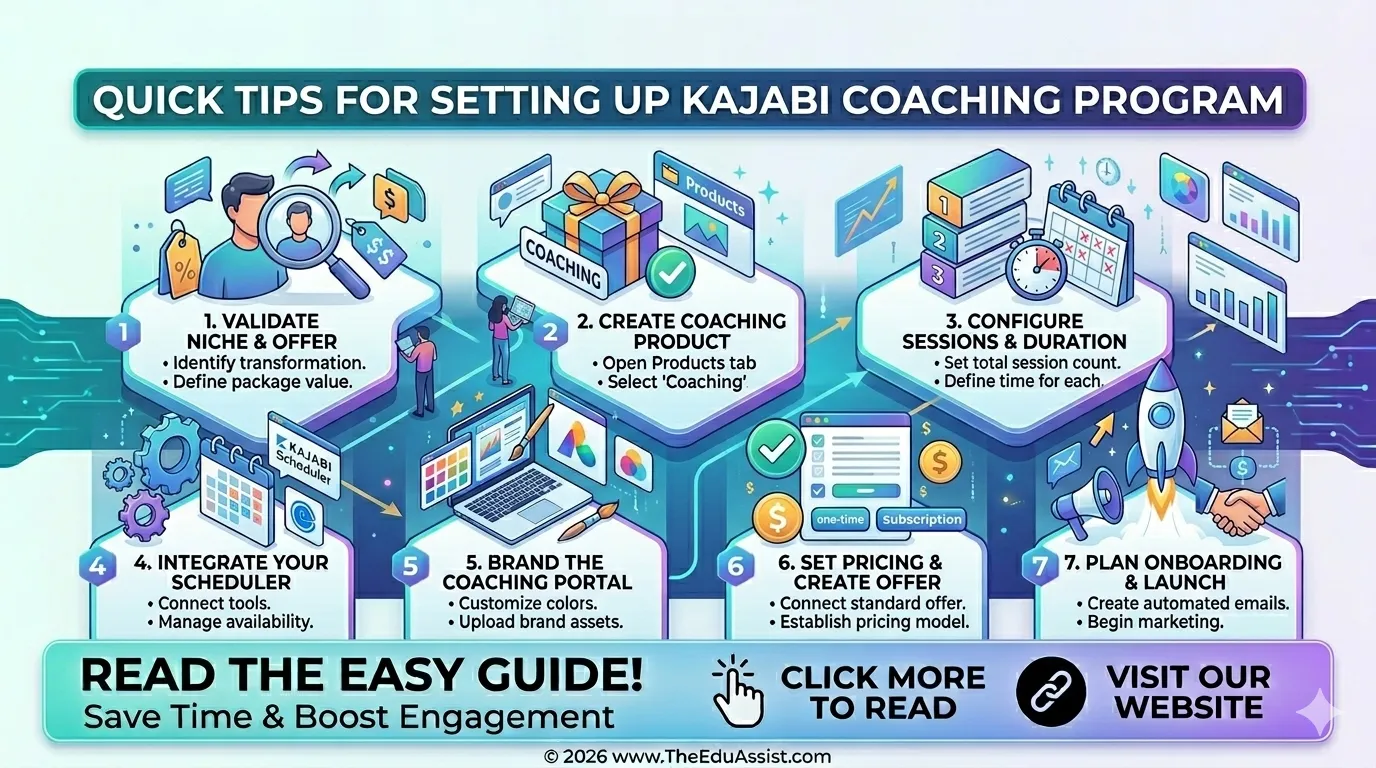
Step 4: Set Up Offers and Pricing
Now that your product exists, you need an Offer to sell it.
4.1 What Is an Offer in Kajabi?
An Offer is the “sales wrapper” around your product. It includes:
- Price
- Payment type (one‑time, subscription, payment plan)
- Access level (course, downloads, coaching, etc.)
A single product can have multiple offers with different prices or structures.
4.2 Create Your First Offer
- Open your Product (Course or Download).
- Click Offers → New Offer.
- Choose a pricing model:
- One‑time payment – Customer pays once for permanent access.
- Subscription – Monthly or annual access.
- Payment plan – Split into installments.
- Set the amount:
- Start with a beta price if you’re testing.
- Use competitor research to benchmark (e.g., similar courses in your niche).
- Configure access rules:
- Which product(s) are included
- How long access lasts (forever, 12 months, etc.)
- Click Save & Publish.
4.3 Structure Upsell and Bundle Offers
Kajabi lets you bundle products inside one offer:
- Example 1:
- Core product: “Microlearning Design Course”
- Add‑on: “Script Template Pack + Feedback Review”
- Example 2:
- Base offer: $199
- Plus offer: $299 with 1:1 coaching session
This boosts your average order value and gives learners more value for a slightly higher price.
Step 5: Build a Website and Sales Page
Kajabi hosts your website and lets you turn any page into a sales page.
5.1 Pick a Website Template
- Go to Website → Pages.
- Choose a template that matches your brand.
- Click Customize to update fonts, colors, and logos.
5.2 Create a Product Sales Page
- Click Add Page → Sales Page.
- Choose the Product you want to sell on this page.
- Add:
- Headline – Clear benefit statement
- Short description – Who it’s for and what they’ll get
- Features or modules list
- Testimonials or social proof
- Checkout button (linked to your Offer)
Example structure for a sales page:
- Benefit‑driven headline
- Short paragraph explaining the problem
- Bullet list of what’s included
- Price section with CTA
- FAQ or policy section
You can also add a free mini‑course or resource as a lead magnet above the checkout to capture email addresses.
5.3 Add a Landing Page for Lead Capture
To grow your audience:
- Create a Landing page.
- Add:
- A headline
- A short description
- A lead capture form
- Link the form to a sequence (e.g., free email course or welcome sequence).
When someone submits the form, Kajabi can:
- Add them to your email list
- Send automated emails
- Suggest your next product
Step 6: Set Up Checkout and Payment
Kajabi integrates Kajabi Cart and Kajabi Payments so you can sell multiple products in one checkout.
6.1 Connect Your Payment Method
- Go to Settings → Payments.
- Connect Stripe or PayPal (or use Kajabi Payments if available in your region).
- Set your currency and tax rules.
6.2 Enable Shopping Cart and Multiple Products
Once payments are connected:
- You can bundle multiple products in one checkout.
- Users can add to cart from different sales pages and pay in a single transaction.
This is powerful for:
- Upselling a course + template pack
- Offering tiered pricing (basic vs premium)
6.3 Use Payment Plans or “Buy Now, Pay Later”
Kajabi supports:
- One‑time payment
- Installment plans
- Subscription billing
- Buy now, pay later (AfterPay / Klarna, where available)
Choose the option that reduces friction for your audience without hurting your margins.
Step 7: Automate Marketing with Kajabi
Automation turns your Kajabi site into a lead‑to‑sale engine.
7.1 Build Email Sequences
- Go to Marketing → Sequences.
- Create a sequence for:
- Welcome emails
- Onboarding for new customers
- Promotional campaigns for new products
Each sequence can contain:
- Automated emails
- Delays between emails
- Triggers (e.g., purchase, page visit, form submission)
7.2 Connect Pages to Sequences
When someone:
- Buys a product → Add them to an onboarding sequence with:
- Access instructions
- First‑lesson reminders
- Additional tips
- Submits a lead form → Add them to a nurture sequence with:
- Mini‑lessons
- Case studies
- Soft offers
7.3 Use Pop‑Up Checkout and Offers
Kajabi supports Pop‑Up Checkout, which lets you:
- Offer multiple prices on the same page
- Show different pricing strategies (one‑time, subscription, payment plan)
- Test different bundles
Use this to:
- Test pricing tiers
- Increase conversion on high‑traffic pages
Step 8: Manage Students and Updates
Once sales start rolling in, you need to manage students and keep your content fresh.
8.1 View Your Customers
For each product:
- Go to Products → Select a product → Customers.
- You can see:
- Who purchased
- When they enrolled
- Which offer they used
You can also export this data for reporting.
8.2 Update Course Content
You can update:
- Videos
- PDFs
- Text lessons
- Quizzes
without changing the product ID or breaking existing enrollments. Students will see the updated version next time they log in.
8.3 Use the Member Library
Kajabi gives each customer a Member Library where they can:
- Access all their purchased courses
- Download all their files
- View progress
This central hub improves user experience and reduces support questions.
Real‑World Example: Turning a PDF into a Product
Imagine you are a learning designer who creates a microlearning script template PDF.
Here’s how you can turn it into a Kajabi product in 10 minutes:
- Create a Downloads Product
- Title: “Microlearning Script Template Pack”
- Description: “10 editable script templates for 5‑minute learning modules.”
- Upload 10 PDFs.
- Create an Offer
- One‑time price: $29
- Permanent access to all templates
- Update Style Guide
- Choose a professional color palette.
- Match your brand fonts.
- Add a Sales Page
- Headline: “Turn Ideas into Engaging Micro‑Lessons in Minutes”
- Description and bullet list of benefits
- Checkout button linked to your Offer
- Set Up Email Sequence
- Send a welcome email with download link tips
- Suggest upgrading to a full course later
Now you have a low‑friction product that can sit alongside your flagship course and steadily increase revenue.
Step 9: Scale with Bundles, Challenges, and Memberships
As your audience grows, Kajabi helps you layer more products.
9.1 Create Mini‑Courses and Challenges
You can package content as:
- Mini‑courses – 3–5 days of short lessons
- Challenges – 7–14‑day email + content challenge
Use these as:
- Lead magnets
- Low‑ticket entry offers
- Upsells to your main course
For example:
- Free 5‑day email challenge → upsell to paid course
- Paid 7‑day challenge → upsell to coaching program
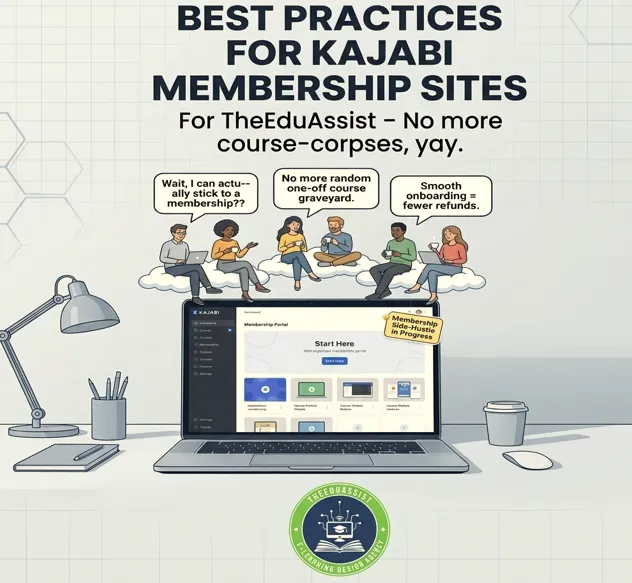
9.2 Build Membership Sites
If you want recurring revenue:
- Create a Membership product.
- Add multiple courses, downloads, and community features.
- Set a monthly or annual subscription price.
This works well for:
- Training institutes
- Corporate L&D programs
- Online academies
9.3 Use Bundles to Increase Value
Kajabi lets you combine:
- Courses
- Downloads
- Coaching sessions
- Community access
into one bundle offer. This:
- Increases perceived value
- Reduces support complexity (one offer instead of many)
- Makes sales easier (less decision fatigue for buyers)
Step 10: Optimize and Test Your Kajabi Setup
Your first version doesn’t have to be perfect. The key is to launch, measure, and iterate.
10.1 Track What Matters
In Kajabi Analytics, focus on:
- Conversion rate – How many visitors buy?
- Average order value – What are they spending?
- Email open/click rates – Are your sequences engaging?
Use this data to:
- Adjust pricing
- Improve messaging
- Refine offers
10.2 Test Pricing and Offers
Kajabi’s Pop‑Up Checkout and multiple offer features let you:
- Test different price points
- Offer beta or early‑bird pricing
- Try “Pay What You Want” with a minimum
Observe:
- Which price converts best
- Which bundle gets more uptake
Then keep the winners and discard the underperformers.
10.3 Improve UX and Design
Check your site from a learner’s perspective:
- Can they find the product and buy it in 2–3 clicks?
- Is the description clear and benefit‑focused?
- Do colors and fonts match your brand?
Small tweaks to layout, copy, and button text can significantly boost conversion.
Why This System Works for TheEduAssist
If you run TheEduAssist, using Kajabi to create digital products lets you:
- Offer structured learning programs instead of one‑off sessions
- Scale your L&D content to remote teams or global clients
- Generate passive income while maintaining high‑quality design
- Keep everything in one platform (no more juggling hosting, email, and checkout tools)
Whether you’re:
- An internal L&D manager
- A freelance instructional designer
- A training institute owner
This Kajabi‑based workflow lets you systematize your knowledge, control your brand, and serve more learners efficiently.
Conclusion:
Creating digital products with Kajabi gives you a clear, all‑in‑one system to turn your expertise into structured courses, downloads, and memberships without juggling multiple platforms.
For TheEduAssist, this means you can:
- Design and host professional learning programs in one place
- Sell digital products with simple checkout and pricing options
- Automate onboarding and follow‑up with email sequences
- Scale from mini‑courses to full membership sites
The key is to start small build one clear product, test it with a focused audience, and then refine based on real data from Kajabi’s analytics.
If you’re ready to make your knowledge a scalable learning business, create your first Kajabi product this week and connect it to your audience through a simple sales or landing page.
References:
Kajabi. (2026). Kajabi tutorial for beginners. Kajabi Blog. https://www.kajabi.com/blog/kajabi-tutorial-for-beginners
Jiffy Courses Online. (2025). Smart ways to sell more digital products with Kajabi. Jiffy Courses Online Blog. https://www.jiffycoursesonline.com/blog/smart-ways-to-sell-more-digital-products-with-kajabi
Kajabi. (2026). Best types of digital products to sell in 2025. Kajabi Blog. https://www.kajabi.com/blog/best-types-of-digital-products-to-sell
Frequently Asked Questions
What types of digital products can I create using Kajabi?
You can create:
- Online courses (video‑based, multi‑lesson programs)
- Digital downloads (PDFs, templates, checklists, Canva files, Notion templates)
- Mini‑courses and challenges (short, focused programs or email + content challenges)
- Coaching programs (1:1 or group offers)
- Membership sites (subscription‑based communities with ongoing content)
- Workshops and replay‑based products
Kajabi lets you turn almost any form of knowledge into a sellable digital product.
Do I need any technical skills to create digital products on Kajabi?
No advanced technical skills are needed. Kajabi is beginner‑friendly and uses:
- Drag‑and‑drop tools
- Pre‑built templates for websites and sales pages
- Simple content upload (videos, PDFs, images)
You only need basic computer skills and a clear teaching outline.
Can I sell my digital products on Kajabi?
Yes. Kajabi includes everything you need to sell:
- Built‑in checkout and Kajabi Cart for multiple products
- One‑time payments, subscriptions, and payment plans
- Product bundles and upsells
- Integrations with Stripe, PayPal, and Kajabi Payments
You can sell courses, downloads, memberships, and coaching directly from your Kajabi site.
Is there customer support available if I encounter issues while creating products on Kajabi?
Yes, Kajabi offers:
- 24/7 live chat support (on higher‑tier plans)
- Email support
- Detailed Help Center articles
- Kajabi University and training resources
You can access support from the Kajabi dashboard anytime.
Final CTA: Start Your First Kajabi Product Today
If you’re ready to turn your expertise into a real digital product:
- Choose one small outcome (e.g., a 5‑lesson mini‑course or a 10‑page PDF pack).
- Log into Kajabi and create that product following the steps above.
- Build a simple sales page and test it with a small group (email list, LinkedIn, or internal stakeholders).
You don’t need a perfect course to start. You need one clear offer that solves a real problem.
Create your first Kajabi product this week, and you’ll be one step closer to turning your knowledge into a scalable, revenue‑generating learning business.
Authored By: Atiqa Sajid http://www.linkedin.com/in/atiqa-sajid-747b57137